
Unlock the Full “In 5 Steps” Series
This step-by-step guide is exclusively available for Lead with AI PRO membership.
🚀 With Lead with AI PRO, you’ll get:
✅ Access to expert-crafted step-by-step guides
✅ AI-powered workflows to boost productivity
✅ Exclusive tools and resources for smarter work
Upgrade to Lead with AI PRO and access all premium content instantly.

In 5 Steps: Bulk-create Branded Social Assets using Figma Buzz
Say goodbye to the day you have to copy paste 8 times to have 8 client testimonial cards. Figma Buzz lets you turn plain spreadsheets into polished branded assets in minutes.
In this example, we will bulk create client testimonial cards from a simple excel sheet.
Subscribe to The Only AI Newsletter Business Leaders Will Ever Need
We track all AI updates daily, test the tools, and deliver only the gold—twice a week.trends shaping the future of work.
Unsubscribe anytime. No spam guaranteed.
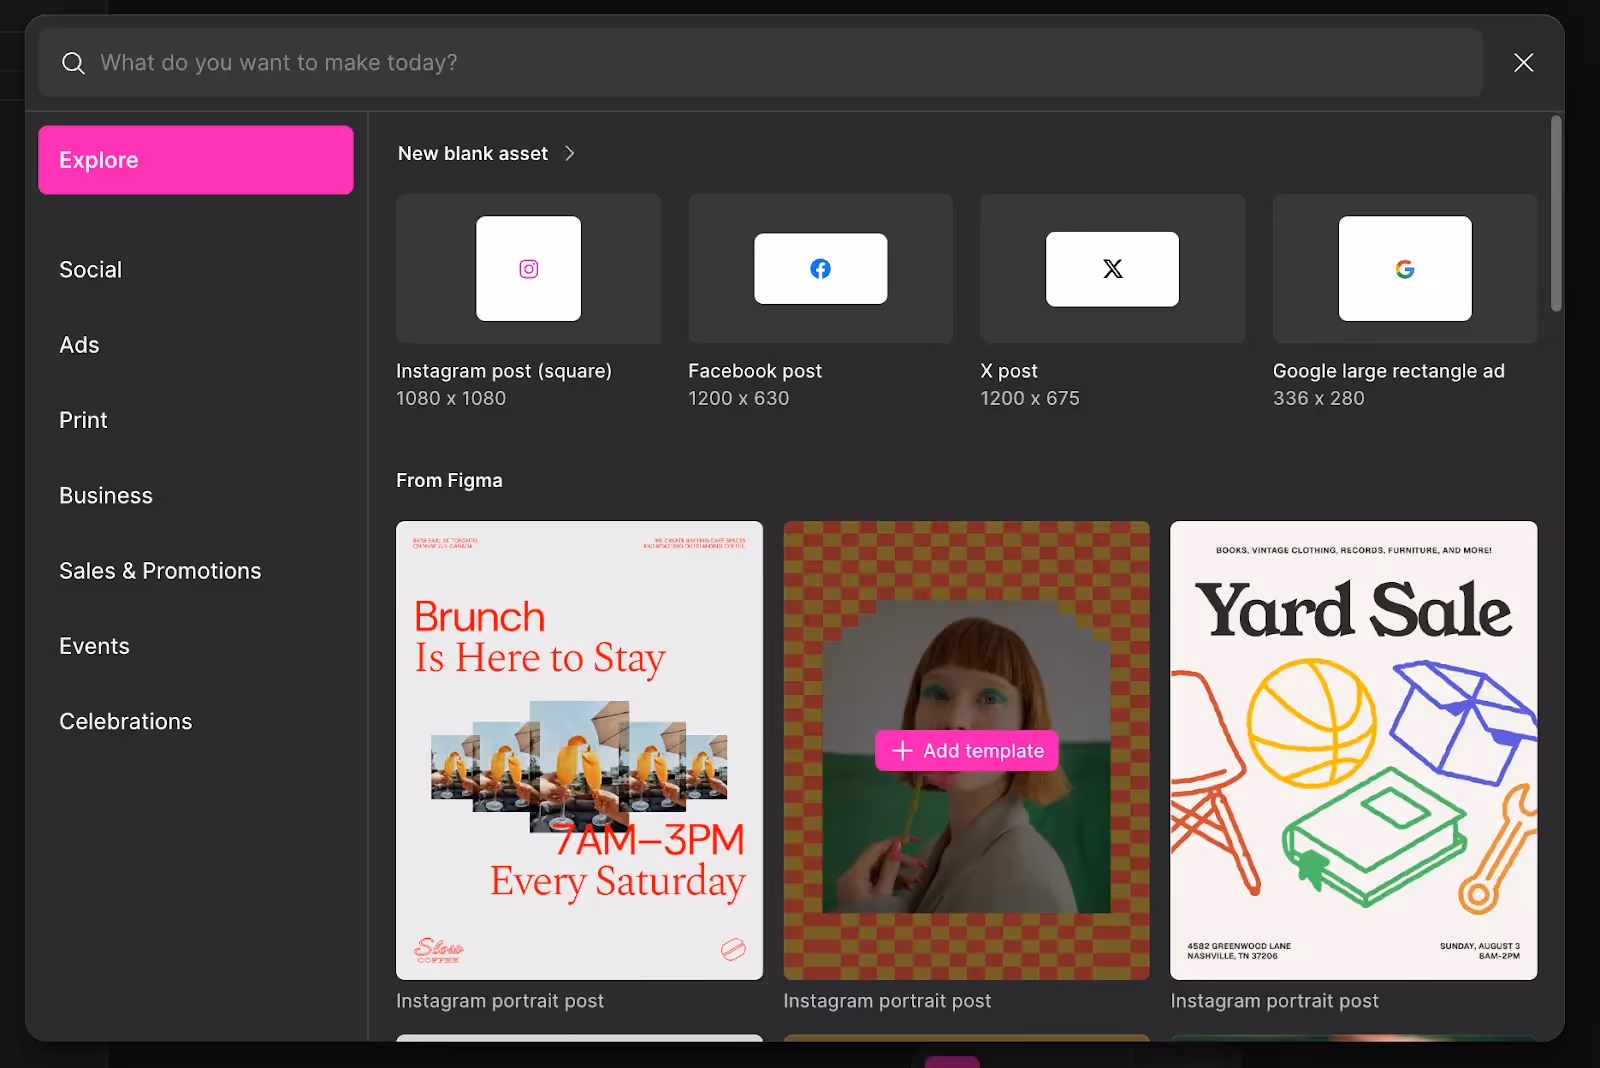
Step 1: Pick a Figma Buzz Testimonial Template
Start by heading into Figma Buzz and choosing a testimonial-style template. You can quickly browse through Figma’s available templates based on your needs (e.g. social, ads, print, events).
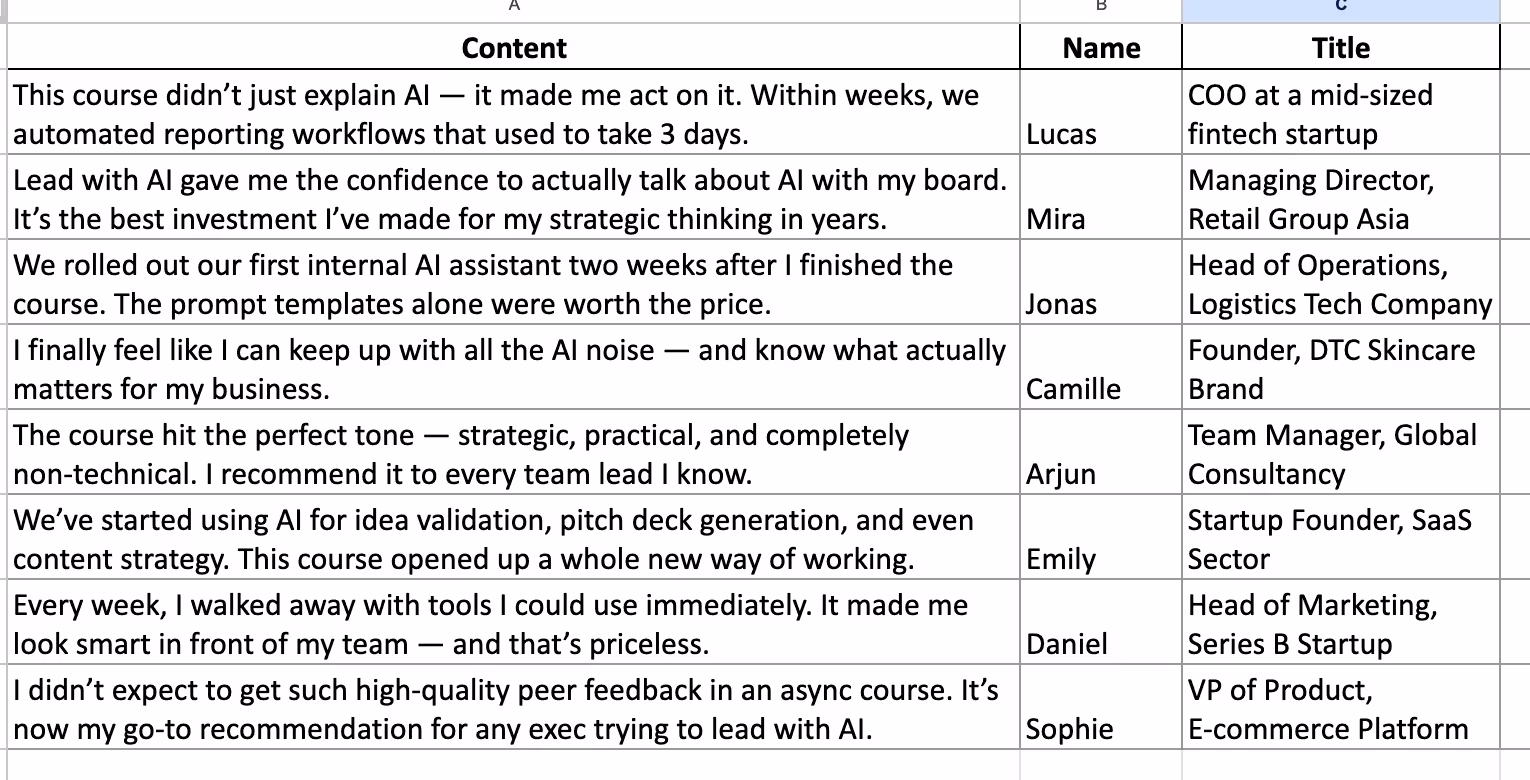
Step 2: Gather Testimonials in an Excel Sheet
You can:
- Collect real testimonials from your CRM, inbox, or Google reviews
- Or ask ChatGPT to compile from your internal documents to create realistic testimonials with information on “Content”, “Name”, “Title” in separate columns
Step 3: Upload Your Sheet to Bulk Create
In Figma Buzz, go to Bulk Create, upload your .xlsx or .csv file, and preview how your slides will look with each row. Buzz automatically duplicates your design per row.
Step 4: Map Content to Design Elements
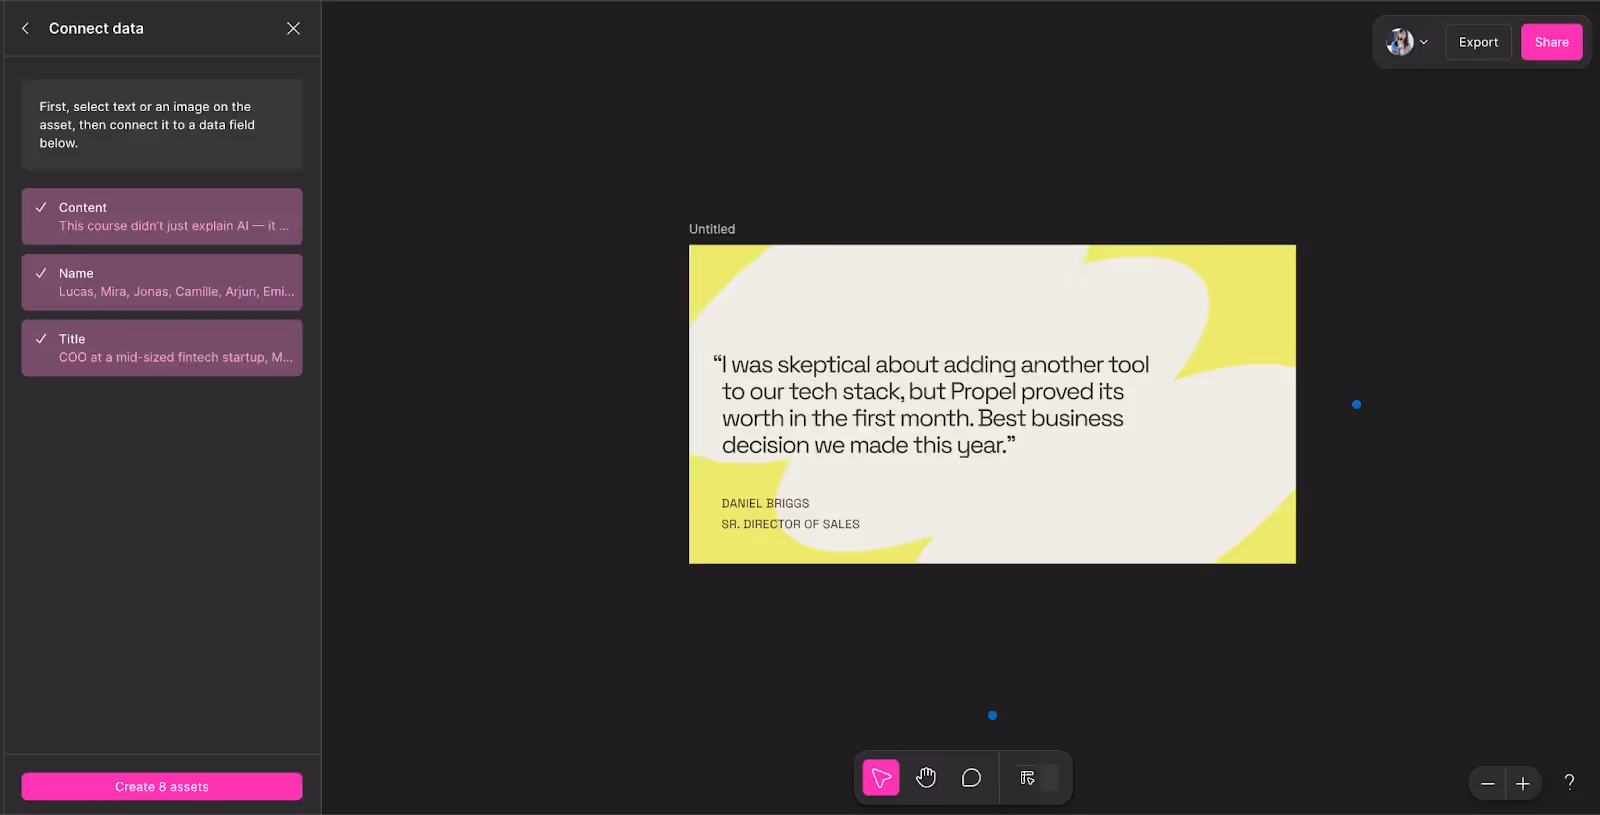
Match spreadsheet columns to elements in your template:
- “Content” → testimonial text
- “Name” → person’s name
- “Title” → their role or company
Double-check alignment and fonts. Buzz keeps it clean, but edits are easy if needed.
Step 5: Export + Extend Your Design

Hit Export to download your testimonial set as high-quality images or PDFs, ready for social or web design.
Other ideas to try with Figma Buzz:
- Bulk-create speaker announcement post
- Create a LinkedIn carousel post
- Turn blog quotes into social media posts
- Design a team intro series in one go
- Repurpose customer reviews into highlight reels
- Create workshop slides from bullet points
Whether you’re sharing glowing testimonials, announcing speakers, or turning content into carousels, Figma Buzz lets you scale branded visuals effortlessly.
No more manual copy-paste. No more fiddling with layout. Just pick a template, plug in your sheet, and let Buzz do the work.
What will you bulk-create next?
Subscribe to The Only AI Newsletter Business Leaders Will Ever Need
We track all AI updates daily, test the tools, and deliver only the gold—twice a week.trends shaping the future of work.
Unsubscribe anytime. No spam guaranteed.
In 5 Steps: Bulk-create Branded Social Assets using Figma Buzz
Say goodbye to the day you have to copy paste 8 times to have 8 client testimonial cards. Figma Buzz lets you turn plain spreadsheets into polished branded assets in minutes.
In this example, we will bulk create client testimonial cards from a simple excel sheet.
Subscribe to The Only AI Newsletter Business Leaders Will Ever Need
We track all AI updates daily, test the tools, and deliver only the gold—twice a week.trends shaping the future of work.
Unsubscribe anytime. No spam guaranteed.
Step 1: Pick a Figma Buzz Testimonial Template
Start by heading into Figma Buzz and choosing a testimonial-style template. You can quickly browse through Figma’s available templates based on your needs (e.g. social, ads, print, events).
Step 2: Gather Testimonials in an Excel Sheet
You can:
- Collect real testimonials from your CRM, inbox, or Google reviews
- Or ask ChatGPT to compile from your internal documents to create realistic testimonials with information on “Content”, “Name”, “Title” in separate columns
Step 3: Upload Your Sheet to Bulk Create
In Figma Buzz, go to Bulk Create, upload your .xlsx or .csv file, and preview how your slides will look with each row. Buzz automatically duplicates your design per row.
Step 4: Map Content to Design Elements
Match spreadsheet columns to elements in your template:
- “Content” → testimonial text
- “Name” → person’s name
- “Title” → their role or company
Double-check alignment and fonts. Buzz keeps it clean, but edits are easy if needed.
Step 5: Export + Extend Your Design
Hit Export to download your testimonial set as high-quality images or PDFs, ready for social or web design.
Other ideas to try with Figma Buzz:
- Bulk-create speaker announcement post
- Create a LinkedIn carousel post
- Turn blog quotes into social media posts
- Design a team intro series in one go
- Repurpose customer reviews into highlight reels
- Create workshop slides from bullet points
Whether you’re sharing glowing testimonials, announcing speakers, or turning content into carousels, Figma Buzz lets you scale branded visuals effortlessly.
No more manual copy-paste. No more fiddling with layout. Just pick a template, plug in your sheet, and let Buzz do the work.
What will you bulk-create next?
Subscribe to The Only AI Newsletter Business Leaders Will Ever Need
We track all AI updates daily, test the tools, and deliver only the gold—twice a week.trends shaping the future of work.
Unsubscribe anytime. No spam guaranteed.